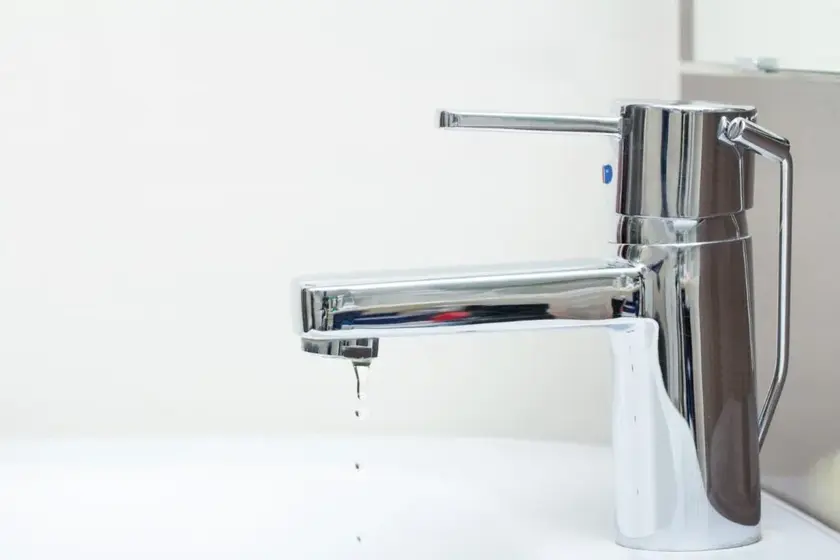
Dealing with a leaky faucet can be frustrating, wasteful, and costly. If you are wondering how to fix leaky faucet, then you’ve come to the right place. You would be happy to know that it is a relatively simple task that you can likely handle on your own.
In this guide, we walk you through the common causes of a leaky faucet, and the tools that you’ll need to do the job. It also covers the step-by-step process to fix the leak, and when it might be time to seek professional help.
There are several common causes that can lead to the annoyance of dripping water. Understanding these causes will help you identify the root of the problem and take appropriate action.
Here are some of the most frequent causes of a leaky faucet:
You don’t need professional plumbing experience to tackle a leaky faucet. With some basic tools and a bit of guidance, you can easily resolve many common faucet issues. It’s a straightforward task that not only saves water but also spares you from unnecessary repair costs.
That said, if you’re uncomfortable with DIY repairs or encounter a complex problem, it’s best to seek professional help.
With Select, your home warranty can cover your faucet repairs and even replacement! Find out what else a home warranty covers.
The time required to fix a leaky bathroom or kitchen faucet depends on various factors, such as the type of faucet, the extent of the problem, and your familiarity with the repair process.
Even so, a basic fix can often be completed in two hours.
To successfully fix leaky faucet, it’s essential to have the right tools at your disposal.
Here is a list of tools you may need to tackle the repair:
Before beginning any repairs on how to fix leaky faucet, it’s crucial to turn off the water supply and turn off the faucet itself. This step will prevent any accidental water leaks and allow you to work on the faucet without interruptions.
Make sure to have both your bucket and towels handy in case of any remaining water that may come out from the pipes before you move on to the next step.
Using the appropriate screwdriver, remove the screws that hold the faucet handle in place. If there is a decorative cap covering the screws, gently pry it off with a flathead screwdriver. Once the handle is removed, you may need to use an Allen wrench to unscrew the collar or any additional components.
Make sure to refer to the manufacturer’s instructions during disassembly. The method and tools necessary for removal vary depending on the type of faucet you have.
If you don’t have the manual, you can always check the manufacturer’s website. Many have these materials available for download, though you may have to search a bit.
Once the handle is removed, inspect the parts inside the faucet to determine which component is the cause of the leak.
This step is important when learning how to fix leaky faucet. Before reassembling the faucet, clean any mineral deposits, rust, or debris from the components using vinegar or a mild cleaning solution.
Rinse the parts thoroughly and dry them with a clean cloth. Apply a small amount of lubricant to the O-rings and other moving parts to ensure smooth operation and a proper seal.
Mineral deposits are particularly problematic in areas with hard water, where buildup occurs more frequently and can cause recurring faucet problems. Families in San Antonio, known for extremely hard water conditions, often find that faucet repairs become more frequent and complex due to mineral buildup. Many rely on a trusted San Antonio home warranty to handle these ongoing challenges.
Carefully reinstall the faucet parts in the order in which you removed them. Tighten all screws and connections securely but avoid overtightening, as it may cause damage. Use the adjustable wrench or plumber’s wrench as needed to tighten any fittings or connections.
Once you’ve reassembled the faucet, it’s time to test it for leaks.
Slowly turn on the water supply and watch the faucet closely. Look for signs of leakage around the handle, spout, or base.
If everything appears to be in order, congratulations! You have successfully fixed your leaky faucet. If you notice any leaks, double-check the connections, and ensure everything is tightened correctly.
If your faucet is dripping after rechecking all your work, it may be time to seek help from a professional.
While fixing a leaky faucet is a manageable task for most homeowners, certain situations may require professional assistance.
Consider seeking help if:
At Select Home Warranty, we understand that some home repairs can be challenging or time-consuming. That’s why we offer home warranty coverage for plumbing systems and leaks to protect you from unexpected expenses.
Our network of skilled professionals is available to assist you with a wide range of home repairs, including leaky faucets. If you’re unsure how to fix leaky faucet yourself, our experts are here to help.
If you already have coverage, submit your claim today.
Don’t have a home warranty? Getting a quote is quick, easy, and totally free. Click on the link below or call us at 800-670-8931.
Looking for other easy home repair DIYs? Check out other common home repairs you can do yourself.

Don’t wait until it’s too late! Check out our current plans and get your free quote.

Real Estate
Before summer ends, take advantage of the warm weather for more than a vacation. This is the best time of year for easy DIY projects that are fun, relaxing and..

Household Tips
Boilers are among the most efficient methods of home heating, keeping your home reliably warm through winter months. There are a few ways you should check up on your boiler..

Home Warranty
If you’re a homeowner, hazardous materials are a serious concern. Whether you’re buying an older home or worry about the introduction of such materials in a newer construction, it’s important..