If your heat suddenly cuts out during a cold night, knowing how to replace a furnace ignitor can save you time and worry. Many homeowners try simple DIY repairs when the issue is minor, and changing ignitors often falls into that category. Still, furnaces deal with electricity and gas, so safety and patience matter.
This guide breaks everything down in a simple, homeowner-friendly way. You will learn the signs of a bad ignitor, when DIY makes sense, clear steps for replacing it, and what it usually costs.
Your furnace ignitor is a small but critical component. It heats up to ignite the gas that warms your home. Most modern furnaces use hot-surface ignitors made from silicon carbide or silicon nitride.
So, how do you know if your ignitor is the problem?
Your furnace will give you clues if you know what to watch for. Here are the most common warning signs:
It clicks but never warms up
The materials are extremely fragile. Silicon carbide ignitors crack easily from thermal stress and vibrations. According to the U.S. Department of Energy, regular maintenance can prevent many component failures, but they naturally wear out over time.
Older pilot light systems have been replaced in most homes built after 2010. Hot-surface ignitors are now standard because they are more efficient and reliable.
Yes, many homeowners can handle this repair if they are comfortable with basic tools. The process is short, and the part is easy to reach in most units.
However, there are times DIY isn’t a good idea:
Note: These heating system components are fragile. Even a small tap can break them.
Estimated time: 20–45 minutes
Skill level: Basic to moderate DIY.
Replacing an ignitor is a task many homeowners can handle, but safety must come first. Furnaces combine electricity and gas, which means even small mistakes can cause damage or injury. So before you start, make sure you understand the steps, gather the right tools, and give yourself plenty of time.
Note: If you smell gas at any point, stop immediately. Leave your home and call your gas company.
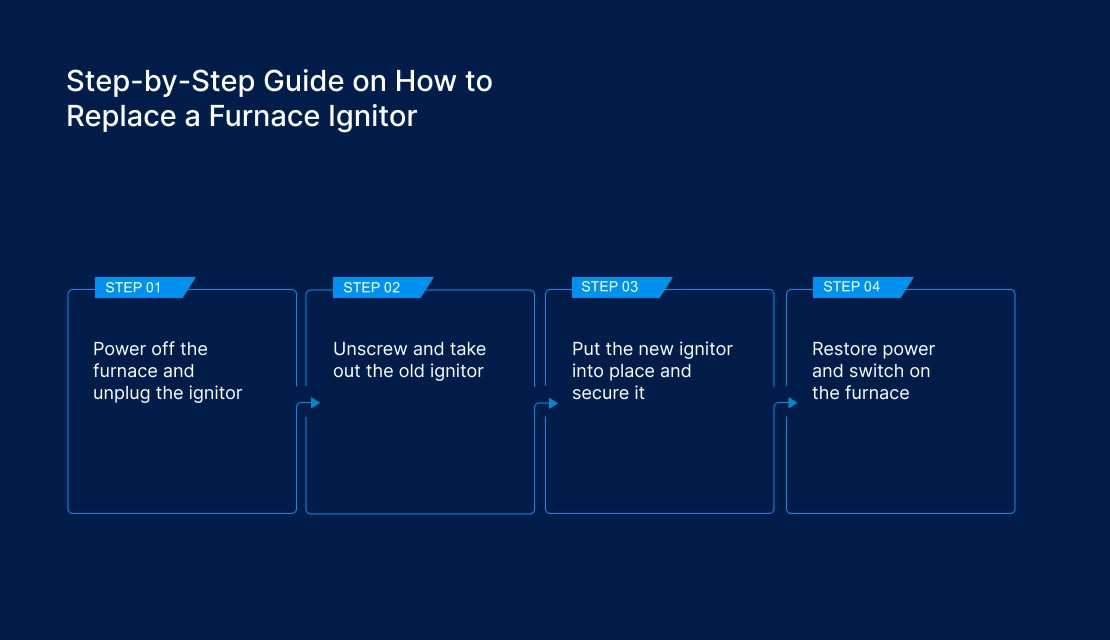
Now that you have all the toolbox ready, you can begin the four DIY steps for replacing the ignitor.
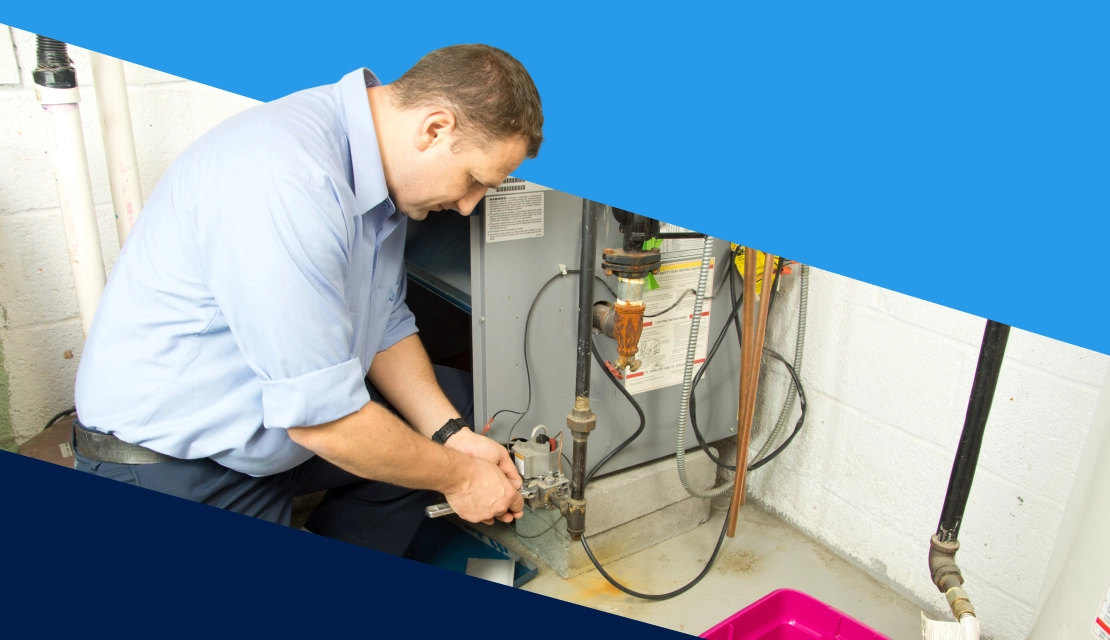
Before touching anything, safety comes first. Turn off the furnace completely at the wall switch, and then unplug it from the electrical outlet. This ensures no accidental sparks or electrical shocks while you work. Always give the unit a few minutes to cool before opening the access panel.
Once the power is off, remove the access door using a screwdriver. Inside, you’ll see the ignitor connected to the control board with a small plastic plug. Carefully pull the plug out to disconnect the wires, making sure not to tug on the wires themselves.
After disconnecting the ignitor, use a screwdriver to remove the small screws securing it to the burner assembly. Hold it gently while loosening the screws to avoid dropping or cracking it, as it is very fragile. Once the screws are out, carefully lift the ignitor straight from its slot.
Take a close look at the model for cracks, discoloration, or any signs of wear. These physical cues often indicate the reason it failed. If it appears intact, the issue may lie elsewhere in the hot surface ignitor, in which case calling a professional is the safest next step.
While inspecting, note the make and model number. This information is helpful when purchasing a replacement unit, ensuring you buy the correct part for your specific system. Keeping this record avoids mistakes and extra trips to the store.
Before handling the new ignitor, put on clean gloves to prevent oils from your skin from damaging it. Avoid touching the ceramic heating surface. Carefully unpack the new unit and position it in the same slot as the old one, aligning it exactly for proper operation.
Insert the mounting screws gently, tightening just enough to hold the unit in place. Over-tightening can easily break the ceramic, so go slow and steady. Reattach the wiring connector, making sure it clicks securely into the socket.
Once the ignitor is in place and wires connected, close the access panel. Check that everything is seated properly and that the screws are snug. This careful installation ensures it functions reliably without unnecessary stress on the delicate components.
With the unit installed, plug the furnace back into the outlet and flip the power switch on. Set the thermostat to a warmer setting to start the cycle. You should hear the familiar click as the system begins operation and see it glow within seconds.
As the unit reaches the correct temperature, the gas valve opens, and the boiler ignites. Heat will start flowing through your home once ignition occurs, indicating a successful replacement. Keep an ear out for unusual noises, which could signal improper installation.
Furnace ignitor replacement, when done by yourself, costs $20-$100 for the part. That’s your only expense.
Professional replacement runs much higher. Expect to pay $150-$300, depending on your location and whether you have a warranty plan.
Labor costs vary dramatically by region, with some markets charging significantly more for HVAC system services. Delaware homeowners often face premium repair rates, with service calls starting at $200 before any work begins. Hence, most of them find that a Delaware home warranty is affordable. It eliminates these variable costs, replacing them with predictable service fees regardless of the repair complexity.
Also, to understand which warranty suits your need best, you can check out our guide on “How to Choose the Best Home Warranty for HVAC Conditioner Replacement”.

A quick question to ask yourself here – Is DIY worth it?
If you are comfortable with basic home repairs, then yes, it’s absolutely worth it. You’ll save $125-$250 per replacement. Since ignitors fail every 3-7 years on average, those savings add up.
While knowing how to replace a furnace ignitor saves money on minor repairs, larger heating system issues require professional help. As one of the best home warranty companies in the USA, we’ll connect you with qualified, experienced technicians when problems arise with any covered system. All you have to do is file a claim and the rest will be taken care of by us.
We provide comprehensive coverage for your heating system, including boiler and furnace, and other critical home systems. This way, your wallet always remains protected from unexpected repair costs.
Most silicon carbide models last 3-7 years, while Silicon nitride ones can last 10-20 years but cost more upfront.
Check the model number on the inside panel, then compare it with the part number, shape, and connector style of your old unit. Use these details to search for a matching replacement online or confirm the right part with an HVAC parts supplier.
Your furnace won’t start, or you’ll hear clicking but no ignition. You might see it glow but fail to light the gas.
Yes, if you follow safety procedures. Turn off the power and gas, wear gloves, and don’t touch the ceramic element.
Absolutely. They fail without warning, often during the coldest days. Having a spare means immediate repairs.

Don’t wait until it’s too late! Check out our current plans and get your free quote.

Household Tips
Spring is in the air! It’s time to put away the snow shovels and get out your gardening spade. But before you tend to your azaleas and bust out the..
Household Tips
Big, clunky water tanks are a thing of the past. The future? Compact heaters that provide hot water on demand. Are you considering taking on the challenge of how to..

Home Warranty
Key Takeaways: Saving for your first home starts with setting a clear, realistic target that covers more than just the down payment. A sustainable monthly plan, supported by budgeting and..