Big, clunky water tanks are a thing of the past. The future? Compact heaters that provide hot water on demand. Are you considering taking on the challenge of how to install a tankless water heater yourself? It is one of those projects that sounds straightforward until you realize there is wiring, plumbing, and building codes to think about.
Still, don’t let that intimidate you. With the right steps and safety in mind, you can make it happen. And this guide has you covered.
Tankless heaters have become a favorite for homeowners because of their compact design and efficiency. But unlike swapping out a showerhead, installing one needs more planning. It’s about knowing where to place it, how to connect it, and how to keep everything safe and efficient.
This blog will guide you through the essentials, starting with key considerations before you begin. It also covers the general installation process and step-by-step instructions for both gas and electric units.. Let’s get into it.
Installing a tankless heating unit isn’t just about mounting a shiny new model. Attention to the preparation stage is just as important as the installation itself. The factors you need to consider before installing are:
1. Remove the old unit first
Your existing heater may need to be disconnected and taken out. If it is still functional, you may leave it connected until the new one is ready. Once removed, plan for proper disposal at a scrapyard or local recycling center.
2. Picking the right location
Your tankless unit performs best when installed close to your main hot water usage areas. For single-point applications, mount it near the specific fixture. Whole-house systems work better in central locations with easy access to the main water and gas lines.
3. Indoor or outdoor setup
4. Complexity of the job
You may need stronger gas lines or upgraded electrical wiring to support the system. Always check local codes before starting.
Having everything beforehand helps the process go smoothly and avoids last-minute trips to the store.
Here is a checklist to keep handy:
Proper planning from the start is the key to a hassle-free installation and steady performance. Also, if you are based in a colder state like Ohio, protecting your system from freezing conditions is even more critical. Pairing your system with a reliable home warranty in Ohio provides added protection and peace of mind against unexpected repair costs.
Because on-demand water heaters come in two varieties, gas and electric, the installation method isn’t the same. In the sections ahead, we’ll cover each type individually to guide you through the process.
Unlike storage water heaters, tankless models require more energy when heating on demand. This higher BTU demand often means upgrading your gas line, usually from ½-inch to 1-inch. Before you get started with the tankless water heater installation, you should take a moment to inspect your current setup and measure the space.That way, you’ll know your gas line can handle the load from the start.
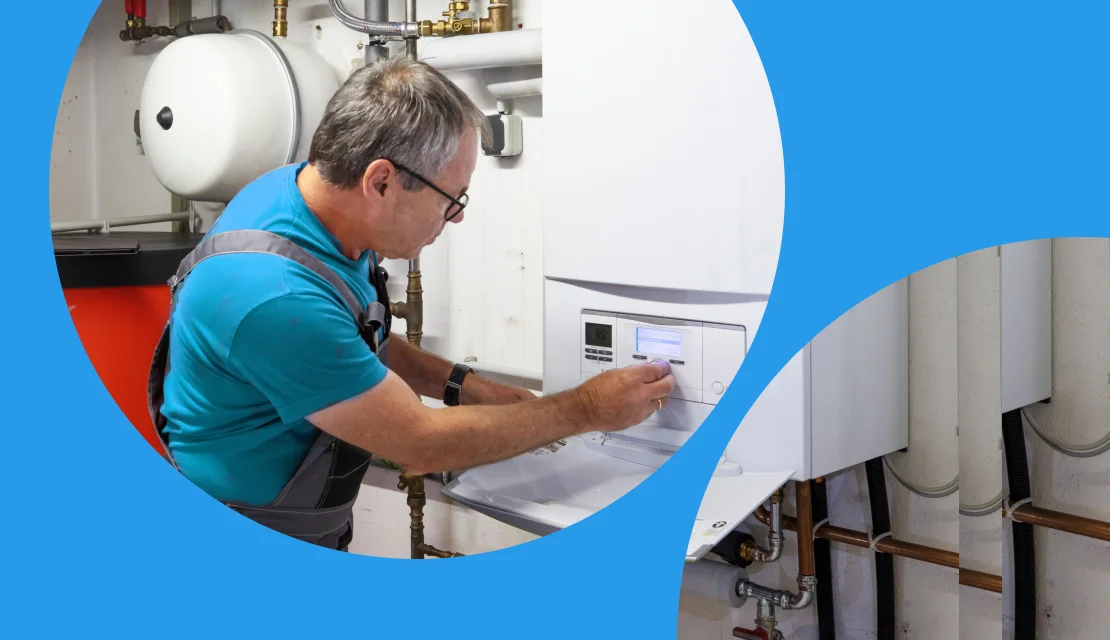
Gas-fired models need direct venting, so pick a location where you can run a pipe to the outside without obstacles. Keep in mind clearance rules around windows and doors. A strong mounting box made from 2×4 lumber and plywood will support the unit’s weight. Once in place, fasten the system to the box, following the setup instructions for how to install a tankless water heater correctly.
Start by attaching service valves to the inlet and outlet of your new on-demand water heater. Use thread seal tape and pipe dope on the connections to ensure they stay watertight. Then, run new ¾-inch copper lines from your existing plumbing to the valves, soldering joints for a permanent seal. If your system has a check valve, add an expansion tank on the cold line to manage pressure safely.
Begin by connecting the gas valve to the inlet of your heater. Make sure to include a shutoff valve and a sediment trap, as required. Use pipe dope and gas-approved Teflon tape on all threaded connections for a tight seal. After all connections are secure, switch on the gas and inspect for leaks using a soapy solution. Avoid using an open flame.
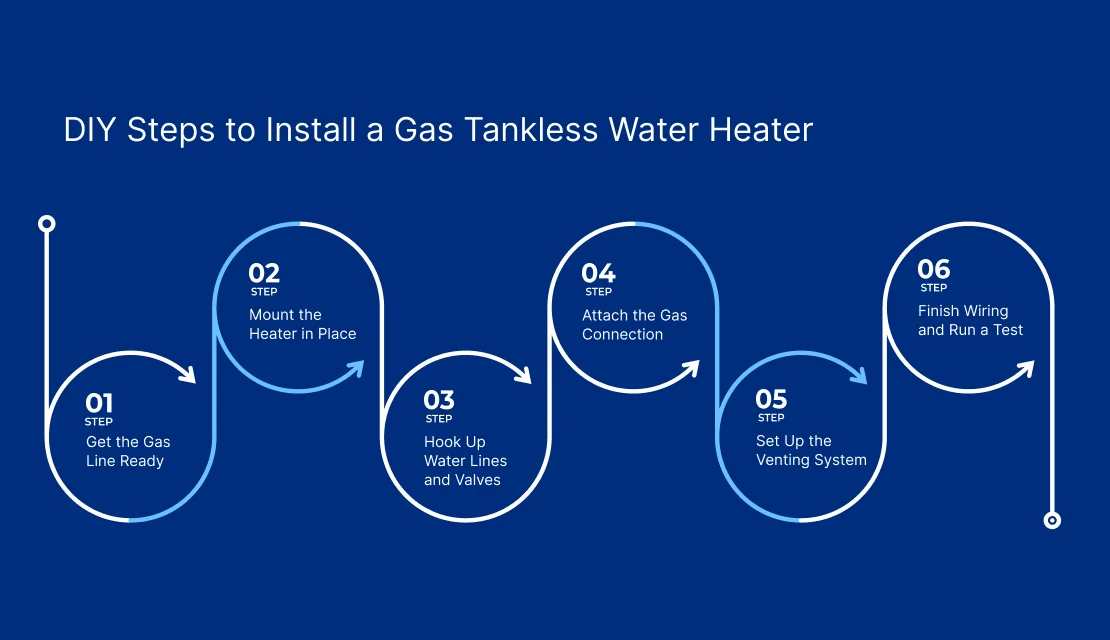
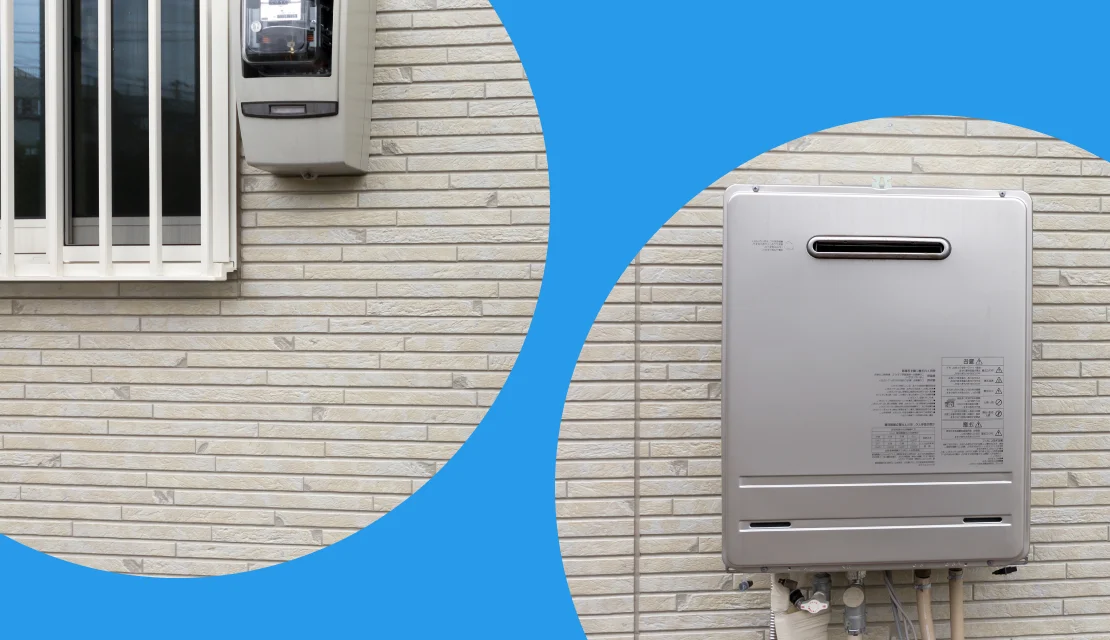
High-efficiency on-demand heaters need venting that goes straight outside, not through a chimney. Drill holes for the exhaust and air intake, keeping clearances from windows and doors in mind. Fit wall thimbles and vent terminations, sealing exterior gaps with silicone caulk. If your unit produces acidic condensate, run it through a neutralizer before sending it to the drain.
Follow the manufacturer’s instructions to connect the electrical supply. Next, slowly open your main water valve to pressurize the system, keeping an eye out for any leaks. Once the water is flowing, turn on the gas and switch on the circuit breaker.
Finally, run hot water from a faucet and watch how the unit performs, making sure the water heats consistently and everything is operating smoothly.
Begin by unpacking the heater and removing the front cover. The key first step in how to install a tankless water heater is to carefully disconnect the display panel to access internal components.
Next, check the spacing requirements in the tankless water heater installation manual and make sure there are no obstructions around the unit. Then, carefully mount it to the wall with the standoffs, ensuring it is level and stable for everyday use.
Start by attaching the inlet and outlet water lines to your new heater. Use flexible piping to prevent strain on the connections. If your home’s water pressure is over 80 psi, install a pressure-reducing valve to protect the system and ensure smooth operation.
Check local codes to see if a temperature and pressure relief valve is required. If yours does, install these valves along with a thermostatic mixing valve to help regulate the water temperature. Maintaining a safe temperature prevents sudden spikes.
Slowly open your main water supply and let hot water run from every faucet connected to the heater. This clears trapped air from the pipes and allows you to check for leaks, ensuring the water flows evenly throughout your home.
Switch off the breaker first, then follow the installation manual to connect the wiring. Check that your breaker can handle the load of the heater and secure all wiring connections tightly. Also, confirm the system is grounded correctly and follows local electrical codes.
Not sure which heater suits your home’s needs best? Check out our detailed guide “8 Types of Water Heaters: Find the Best Fit” for clear insights to help you decide.
The typical expenses you’ll run into when setting one up:
Your final cost depends on the layout of your home, including the distance between the heater and your electrical panel. Extra piping adds a bit as well. On average, installation runs $1,200–$3,500 with most homeowners spending about $2,800. Professional installation usually adds $500–$1,500 more.

Switching to an on-demand water heating system can be a smart move for your home. According to the U.S. Department of Energy, tankless units can boost efficiency by up to 34% compared to standard models.
You have now walked through the steps of installing a new on-demand heater safely and enjoy reliable, energy-conscious comfort. With regular maintenance, they last 15–20 years, saving both space and energy while giving you a steady flow of hot water. Put together, it’s easy to see now why tankless systems have become such a popular choice among today’s homeowners.
No. Tankless heaters rely on electricity to power controls, fans, and gas valves, so they stop working during an outage. Even gas-fired models need electricity for ignition and operation.
A tankless system heats water only when you turn on the tap, instead of storing gallons in a tank. This on-demand process is more energy-efficient and saves space. Since there is no tank, you also avoid common issues like leaks, bursts, or standby energy loss.
A gas model connects to natural gas and usually delivers higher efficiency over time. Electric models, on the other hand, are easier and less costly to install if you don’t already have a gas line. Your decision often comes down to upfront cost versus long-term savings.
Yes, most cities and counties require a permit before installing one. Local plumbing and electrical codes must also be met for a safe setup. Always check your area’s requirements before beginning the installation to avoid compliance issues.
Disclaimer: The information in this article is intended to provide guidance on the proper maintenance and care of systems and appliances in the home. Not all the topics mentioned are covered by our home warranty plans. Please review your home warranty contract carefully to understand your coverage.
Our blogs and articles may link to third-party sites that offer products, services, coaches, consultants, and/or experts. Any such link is provided for reference only and not intended as an endorsement or statement that the information provided by the other party is accurate. We are not compensated for any products or services purchased from these third-party links.

Don’t wait until it’s too late! Check out our current plans and get your free quote.

Home Warranty
Buying or selling a home is an exciting but stressful ordeal. There are many questions each party needs answered. While realtors offer great guidance, not all know to work with..
Household Tips
The moment November hits, there’s only one thing on the minds of every family – Turkey Day! Thanksgiving is all about seeing your loved ones to rejoice over a delicious..

Household Tips
Home exhaust fans can accrue a lot of dust and grime. When this area of your home is not routinely cleaned, it can make a surprising difference to the home’s..