Having your own washing machine and clothes dryer can’t be beat. Of course, with convenience comes care and maintenance. Over time, lint, string, and other debris can build up and clog your dryer vent. Unless you keep up with it, this can lead to serious issues – even disaster.
Fortunately, cleaning a dryer vent is a relatively easy task most homeowners can manage on their own. Read on to learn why it’s important or jump straight to our six-step guide.
The main reason to clean the ventilation duct for your clothes dryer is because it can prevent a fire.
According to the U.S. Fire Administration, 2,900 dryer-related fires are reported annually. Additionally, about one of every three clothing dryer fires are due to negligence or improper cleaning.
With this in mind, it’s essential that you routinely clean your dryer’s ventilation duct.
Ideally, the duct leading from your dryer to the outside of your home should be cleaned every three months, if not more. At minimum, you want to deep clean your dryer vent once a year, but more frequent cleanings are preferred.
Make it a habit to check your dryer’s lint filter before and after you use it. Routine cleaning of the lint filter can help keep your dryer vent from getting blocked.
Check out our clothes dryer cleaning guide for cleaning the machine itself.
There are four main signs that your dryer vent is overdue for cleaning:
Of course, these issues aren’t always caused by a clogged dryer vent. If you successfully clean the ductwork for your clothes dryer and still have these issues, you need to contact a professional for repair right away.
Professional dryer repairs can be expensive, particularly when mechanical failures occur. For example, homeowners in Dallas, where constant dryer use during humid summers accelerates wear, often find that having coverage through a reliable Dallas home warranty makes these necessary repairs much more affordable.
Home warranty coverage through Select can also protect your clothes dryer. If you already have a plan and experience a mechanical issue, submit your claim today.
Haven’t secured your home with SHW yet? Just click the link below or call us at 800-670-8931 to get a free quote today.
When cleaning out your dryer’s ventilation, you’ll need just a few tools and supplies to get the job done.
While some homeowners prefer to call upon a professional for dryer vent cleaning, it’s a DIY task that many choose to take on themselves.
To make cleaning a dryer vent easier, you’ll need to move it out of the way. Before you can do this, power down the machine and unplug it from the wall outlet. If you have a gas dryer, turn off the gas valve.
Remove any clothing from the dryer, clear any lint buildup from the lint screen within the dryer, and make sure nothing’s on top of it before proceeding to the next step.
Carefully pull the dryer away from the wall. You want to shift it far enough so there’s room to get behind it and clean the vent. However, you don’t want to pull it so far that you break the vent or disconnect any other lines feeding to the dryer.
Pro Tip: If your dryer is too heavy for you to move yourself, ask a friend or family member for help.
Typically, dryer vents are connected to the back of the appliance using a hose clamp. Use a screwdriver to loosen the screw on the clamp by turning it counter clockwise. You do not need to completely remove the screw from the clamp.
Once it’s loose enough, you should be able to pull the vent from the back of the machine.
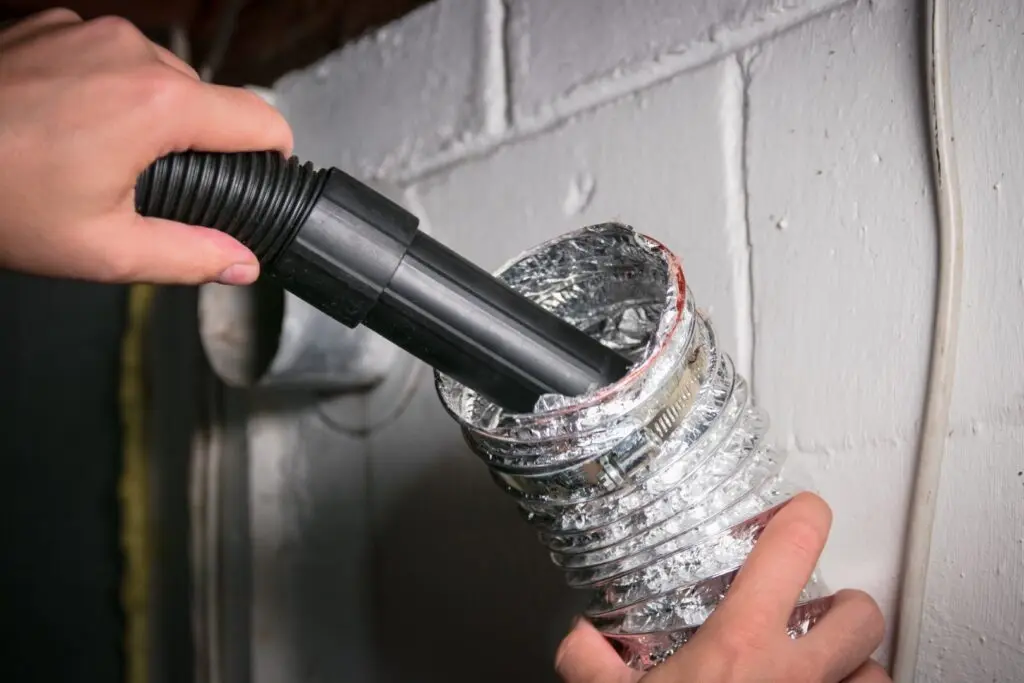
Using a vacuum cleaner with a hose extension, vacuum the inside of the vent.
Depending on your setup and installation, it may be difficult to vacuum inside the dryer vent. In such situations, you may need to use a dryer vent cleaning brush. These specialized tools can be fed into the vent and twisted to dislodge and remove lint from the ductwork.
Any lint buildup in the back of your dryer can be removed by hand. Wear protective gloves to keep your hands safe and reduce the risk of cuts.
Continue to vacuum and brush out the duct until you’ve removed as much as you can.
The exhaust for your dryer vent can be found immediately outside your home on the other side of the wall where the vent is connected. Make sure to vacuum and brush out any lint that has been trapped or built up in this part of the vent.
You may need an extension cord if there isn’t a nearby outlet to plug in your vacuum.
If the ventilation exhausts at a higher point than where it connects to the dryer, it’s worth cleaning again one more time from the inside after cleaning from the exterior. While cleaning, some lint may fall back in. Vacuum this up or remove it from the vent to be sure it’s as clear as possible.
After you’re done, it’s time to put your dryer back together. Reconnect the ventilation duct and tighten the hose clamp using your screwdriver. Make sure you have the dryer’s power plug in front of the unit.
Then, gently push the dryer back toward its original position. Get another person to help you with this step, if needed.
You can then plug the dryer back into its electrical outlet and, in the case of gas-powered dryers, turn on the gas again.
When it comes to clothes dryers, clean and clear vents are only one thing you need to do to keep them working as they should. A home warranty is one of the best things you can do to protect your investment.
Providing coverage for clothes dryers, washing machines, and other major appliances, a home warranty shields your wallet from unexpected breakdowns that would otherwise cost hundreds or even thousands of dollars.
Learn more about why Select Home Warranty is the greatest value for homeowners throughout the nation.
Concerned your clothes dryer is done for? Look for these signs it’s time to replace your washing machine and dryer.

Don’t wait until it’s too late! Check out our current plans and get your free quote.

Household Tips
Overhead fans are a staple fixture in most homes and a great way to keep your home’s temperature regulated. Of course, a clean and well-maintained ceiling fan works wonders for..

Real Estate
If you’re a first-time home buyer or don’t know much about home inspections, you’ll get the most out of one if you learn what to expect going into it. Note..

Home Warranty
Home warranties provide protection against the costs of repairing or replacing a home’s major appliances and systems. Many times during the sale of a home, the new owners may inherit..